
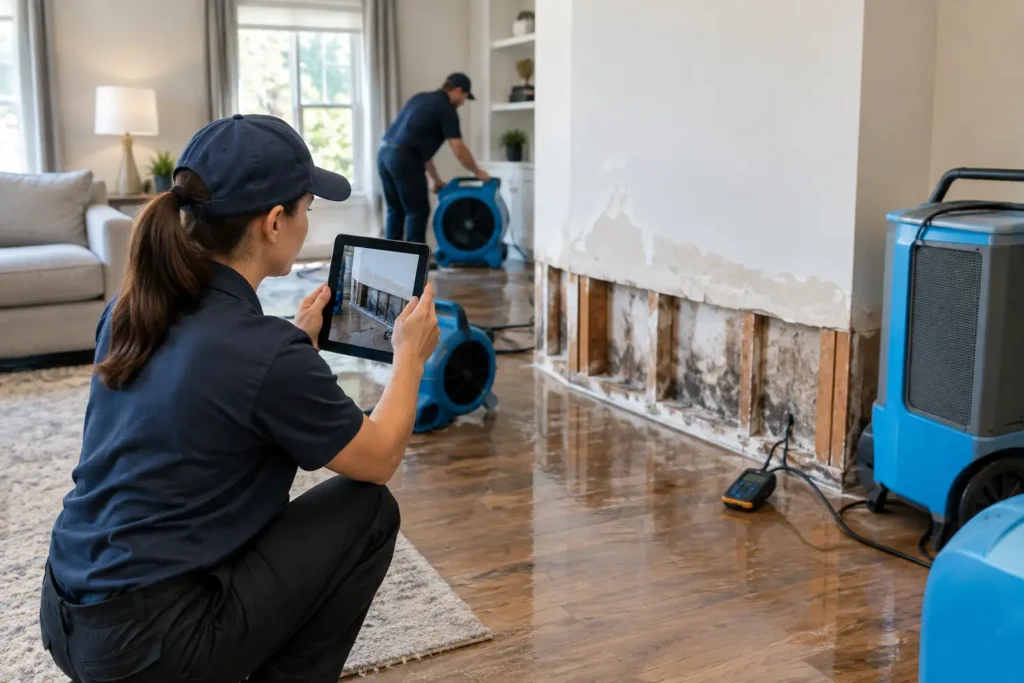
A storm can leave obvious damage, such as a fallen branch or missing shingles, and less visible problems, such as water behind walls or moisture under flooring. The first hours matter. Knowing how to document storm damage properly can give your restoration team and insurance adjuster a clearer picture of what happened while helping you protect your home from further damage.
Your priority is always safety. If there are downed power lines, structural concerns, standing water near electrical sources, sewage contamination, or a damaged roof that could collapse, stay out of the affected area and call for professional help. Documentation should support a safe recovery, not put you or your family at risk.
Start documenting before cleanup begins
If it is safe to do so, begin recording the damage before moving belongings, removing wet materials, or making temporary repairs. Storm damage changes quickly. Water can spread, ceilings can sag further, and wet drywall or flooring may look very different after drying begins.
This does not mean you should wait to stop an active leak or remove standing water. Take a few wide photos and a short video first if possible, then focus on preventing additional damage. A professional restoration team can document conditions during the emergency response while beginning extraction, drying, and moisture monitoring.
Use your phone to capture the overall scene from several angles. Start outside, then work your way indoors. Wide shots establish where the damage occurred. Closer images show the details: a lifted shingle, cracked window, water-stained ceiling, soaked carpet, damaged furniture, or muddy debris line on an exterior wall.
Capture both the cause and the result
Photos are more useful when they tell a complete story. If wind-driven rain entered through a damaged roof area, record the exterior damage as well as the water damage inside. If a backed-up drain or flooding affected a garage, photograph the source area and the belongings or building materials impacted.
Take photos in good light when you can, but do not climb ladders, walk on a wet roof, or enter unstable rooms for a better image. A professional can inspect hard-to-reach or unsafe areas with the right equipment and safety practices.
Create a clear photo and video record
A few random photos may not show the full extent of the loss. Organize your documentation by room or area so it is easier to review later. Include wide, medium, and close-up views of each affected space.
For each damaged room, photograph walls, floors, ceilings, doors, windows, baseboards, cabinetry, and visible belongings. Open closets and cabinets if water may have reached them. Capture water lines, warped materials, peeling paint, buckled flooring, and any visible mold-like growth without disturbing it.
A slow video walkthrough can add valuable context. Narrate the date, the room you are in, and what you see. For example: “This is the living room after the storm. Water is coming through the ceiling near the window wall, and the carpet and area rug are wet.” Keep the video steady and avoid speculation about the cause if you are unsure.
Do not edit, filter, or overwrite original images and videos. Save originals in more than one place, such as your phone, cloud storage, or a computer folder. If you send files to an insurer or restoration company, keep your own copy.
Write down what happened while it is fresh
Photos show condition, but notes provide the timeline. Create a simple storm-damage log as soon as you can. Record the date and approximate time the storm began, when you first noticed damage, and what steps you took to protect the property.
Include details such as when water entered the home, which rooms were affected, whether electricity was shut off, and whether you moved belongings to a dry area. Note any emergency services you contacted, along with the date and time of each conversation.
A useful log also tracks changes. If a ceiling stain grows overnight, flooring begins to buckle, or a room develops a musty odor after water exposure, add it to your notes. These observations can help restoration professionals identify hidden moisture and determine what materials may need drying, cleaning, or removal.
Keep a record of emergency expenses
Save receipts for reasonable emergency steps taken to prevent additional property damage. That may include temporary tarping, protective coverings, emergency plumbing work, water extraction, fans, dehumidifiers, or moving services for damaged contents.
Keep invoices, estimates, receipts, and work authorizations together in one folder. Photograph paper records as a backup. If you speak with your insurance carrier, write down the claim number, representative’s name, and the next steps they provide. Coverage decisions depend on your policy and the circumstances of the loss, so clear records can make communication easier.
Document damaged belongings room by room
Personal belongings are often overlooked during the rush to dry the structure. Before discarding damaged items, photograph them where they were found when it is safe to do so. Then create an inventory that identifies the item, its condition, approximate age, and any available proof of ownership.
For larger items, such as furniture, appliances, electronics, and area rugs, capture manufacturer labels, serial numbers, and model numbers when visible. For smaller items, take grouped photos and list the contents. Receipts, prior photos of your home, appraisals, and credit card statements may also help establish ownership or value.
Do not throw away damaged materials or belongings until you have documented them and received direction from the appropriate parties. However, contamination, odors, and active moisture may require fast action. A restoration professional can help document affected contents while addressing conditions that could worsen inside the home.
Do not overlook hidden moisture damage
Storm damage is not always dramatic. A small roof leak, wind-driven rain around a window, or water entering through an exterior wall can wet insulation, drywall, subflooring, and framing without leaving immediate visible signs.
Watch for discoloration, soft drywall, swollen baseboards, peeling paint, warped wood, damp carpet edges, or persistent odors. Photograph these signs and note where they appear. Avoid assuming that a surface is dry just because it no longer feels wet. Professional moisture meters and thermal imaging can help identify moisture behind finishes and beneath flooring.
In Southern California, storms may be brief but intense. A single heavy-rain event can expose vulnerabilities around roofs, windows, drainage areas, and older building materials. Early inspection and drying can reduce the chance that trapped moisture turns into a larger repair issue.
Let restoration documentation support the claim process
When you bring in a restoration company, ask for copies of the work documentation associated with the emergency response. This may include the initial assessment, moisture readings, photos of affected areas, equipment records, drying logs, and an itemized scope of work.
This documentation serves a different purpose than your personal photos. Your photos show what you observed immediately after the storm. Restoration records show the condition of materials, the mitigation steps performed, and whether moisture levels improved during drying. Together, they create a more complete record of the loss.
SOS Restoration can assist homeowners with emergency damage documentation while beginning the work needed to stabilize the property. Fast extraction, controlled drying, and regular moisture monitoring are especially important when rainwater has entered walls, floors, or ceilings.
What not to do while documenting storm damage
Avoid taking risks for better photos. Do not enter rooms with sagging ceilings, handle wet electrical equipment, climb onto roofs, or move heavy saturated furniture without help. If water may be contaminated, limit contact and keep children and pets away from the area.
Also avoid making permanent repairs before the damage has been documented, unless immediate work is necessary to protect the property. Temporary measures, such as covering an opening or stopping an active water source, may be needed. Photograph the condition first when possible and save receipts for the work.
Most of all, do not let documentation delay emergency mitigation. Water continues to spread and absorb into materials long after the storm has passed. A few careful minutes of photos and notes can preserve the evidence, while a prompt professional response can protect your home, belongings, and indoor environment.
When the weather clears, keep your phone, notes, and receipts together, then let trained restoration professionals help turn a chaotic scene into a clear path forward.